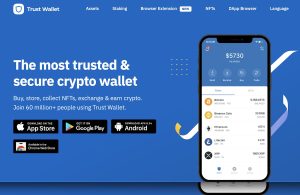
What is Trust Wallet?
Trust Wallet is a decentralized mobile cryptocurrency wallet that allows users to store, send, receive, and swap various cryptocurrencies securely. It supports multiple blockchains and tokens, giving users full control of their private keys. Trust Wallet also integrates with decentralized applications (DApps) directly from the app.

Trust Wallet Basic Features Introduction
Overview of Supported Cryptocurrencies
-
Multi-Blockchain Support: Trust Wallet supports multiple blockchains including Ethereum, Binance Smart Chain, Bitcoin, Solana, and Polygon, allowing users to manage a wide variety of crypto assets within a single application.
-
Thousands of Tokens Available: Users can store and manage thousands of ERC20, BEP20, TRC20, and other tokens. Trust Wallet automatically detects popular tokens or allows users to add custom tokens manually.
-
Native Staking Options: Besides storage, Trust Wallet enables users to stake certain cryptocurrencies like BNB, Tezos, and Cosmos directly from the app to earn passive income, making it a versatile wallet for both storage and investment.
How Trust Wallet Manages Private Keys
-
User-Controlled Private Keys: Trust Wallet does not hold or manage users’ private keys. Private keys are stored locally on the user’s device, meaning users retain full control and ownership of their assets at all times.
-
Secure Recovery Phrase: During wallet creation, users are provided with a 12-word recovery phrase. This phrase acts as a backup, allowing users to restore their wallet on any compatible device if needed, reinforcing the security model.
-
No Custodial Risks: Because Trust Wallet is non-custodial, it minimizes risks associated with centralized hacks. If users properly manage their recovery phrases and device security, their crypto assets remain safe without relying on third parties.
How to Set Up and Use Trust Wallet
Creating a New Wallet Step-by-Step
-
Download and Install the App: First, download Trust Wallet from the official App Store or Google Play Store. Install the application on your mobile device and open it to begin the setup process.
-
Create a New Wallet: Select the option to create a new wallet. You will be prompted to back up your 12-word recovery phrase. Write it down securely and never share it with anyone to protect your assets.
-
Confirm and Secure Your Wallet: After noting the recovery phrase, you must confirm it by selecting the words in the correct order. Once verified, your wallet is fully created and ready for storing and managing cryptocurrencies.
Importing an Existing Wallet Securely
-
Select the Import Option: Open Trust Wallet and choose the “Import Wallet” feature instead of creating a new one. This allows you to access an existing wallet using your recovery phrase or private key.
-
Enter Recovery Phrase or Private Key: Carefully input your 12-word recovery phrase or paste your private key. Ensure there are no typing mistakes, as an incorrect phrase will not restore your wallet.
-
Complete the Import and Verify Assets: After entering the correct information, Trust Wallet will automatically recover your account. Once restored, verify that your assets are correctly displayed, and recheck wallet security settings to maintain protection.
Trust Wallet Token Swap and Exchange Functions
How to Swap Tokens Within Trust Wallet
-
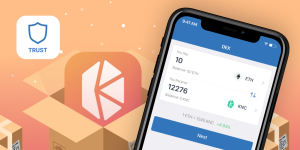
Access the Swap Feature: Open Trust Wallet and navigate to the “Swap” or “DEX” tab. Choose the token you want to swap from and the token you want to receive. Make sure your wallet is connected to the appropriate blockchain network.
-
Adjust Slippage and Transaction Settings: Some swaps may fail if the price moves quickly. Adjust the slippage tolerance within the settings to allow for minor price fluctuations. Always double-check the final amounts before confirming.
-
Confirm and Execute the Swap: Review all swap details, including token amounts, network fees, and estimated time. Confirm the swap and approve the transaction through your wallet. The swapped tokens will appear in your wallet once the transaction is processed.
How to Connect Trust Wallet to Decentralized Exchanges
-
Open the DApp Browser: Launch the built-in DApp browser inside Trust Wallet. If it’s not visible, enable it through the settings. Use the browser to access decentralized exchanges like PancakeSwap, Uniswap, or SushiSwap.
-
Connect Wallet to the DEX: Once on the DEX website, click the “Connect Wallet” button. Select Trust Wallet from the list of supported options. Approve the connection request through the app to link your wallet securely.
-
Perform Token Swaps on DEX: After connecting, you can swap tokens directly on the DEX interface. Select your tokens, set slippage tolerance if needed, and approve transactions. Swapped tokens will be automatically updated in your Trust Wallet balance.
Security Measures of Trust Wallet
How Trust Wallet Protects User Assets
-
Local Private Key Storage: Trust Wallet stores private keys locally on the user’s device instead of on centralized servers. This ensures that users have full control over their funds without relying on a third party.
-
Secure Recovery Phrase: During wallet creation, Trust Wallet generates a 12-word recovery phrase. This phrase is the only way to recover the wallet, emphasizing the importance of securely storing it offline and never sharing it.
-
Encrypted App Environment: Trust Wallet applies strong encryption to protect wallet data within the app. This safeguards sensitive information and helps prevent unauthorized access even if the device is compromised.
Tips to Enhance Trust Wallet Security
-
Enable Biometric Authentication: Activate fingerprint or facial recognition features in the Trust Wallet settings. Adding biometric security makes it harder for unauthorized users to access the wallet app.
-
Store Recovery Phrase Offline: Write down the recovery phrase on paper and keep it in a secure, private location. Avoid saving it on cloud storage, emails, or digital notepads to minimize hacking risks.
-
Keep the App and Device Updated: Regularly update both Trust Wallet and the mobile device’s operating system. Updates often include important security patches that protect against newly discovered vulnerabilities.
Backup and Recovery Process in Trust Wallet
How to Back Up Your Trust Wallet Safely
-
Secure the Recovery Phrase Offline: When you create a Trust Wallet, immediately write down the 12-word recovery phrase on paper. Store the paper in a secure, private location such as a safe, avoiding digital storage to reduce hacking risks.
-
Create Multiple Backups: Make two or three copies of the recovery phrase and store them in different secure places. This protects against accidental loss due to fire, theft, or other emergencies affecting a single location.
-
Avoid Sharing or Uploading the Phrase: Never share the recovery phrase with anyone, including Trust Wallet support staff. Never upload it to emails, cloud drives, or social media to prevent potential leaks or theft.
How to Recover Trust Wallet with a Recovery Phrase
-
Open the Trust Wallet App: Install and open Trust Wallet on a new or reset device. Select the “Import Wallet” option from the startup screen to begin the recovery process.
-
Enter the Recovery Phrase Correctly: Carefully input the exact 12-word recovery phrase in the correct order. Any errors in spelling or sequence will prevent successful recovery, so double-check every word before submitting.
-
Access and Verify Wallet Assets: Once the phrase is accepted, your Trust Wallet will restore. Check the balance and token list to confirm that all assets have been properly recovered, and immediately reapply security settings like biometric locks.